
Anyone who has taken up cross stitch becomes instantly addicted. Seriously! Something about that therapeutic X pattern threaded over and over again. And the best part! Its easy enough for your kiddos to do it too!
When the idea to modernize the standard cross stitch was spoken about in The Skinny’s office, we came up with this idea to create a wood picture of sorts; something you can mix together on a shelf, bookcase or display on its own! We also wanted something that you can do together with your kiddos…the Big kid [that’s you!] can start it and your little kiddos can finish it! It’s fairly easy – you just need to operate a simple drill, and it’s so versatile as you can really make any design you want! Here we created a Modern Wood Cactus, because what is more trendy than the cactus right now?!
[the answer: not much! ]
 Crafting with Kids: Wood Cactus Stitch
Difficulty: Medium [just the drilling part] || Mess Factor: Medium [hello, wood chips!]
Directions:
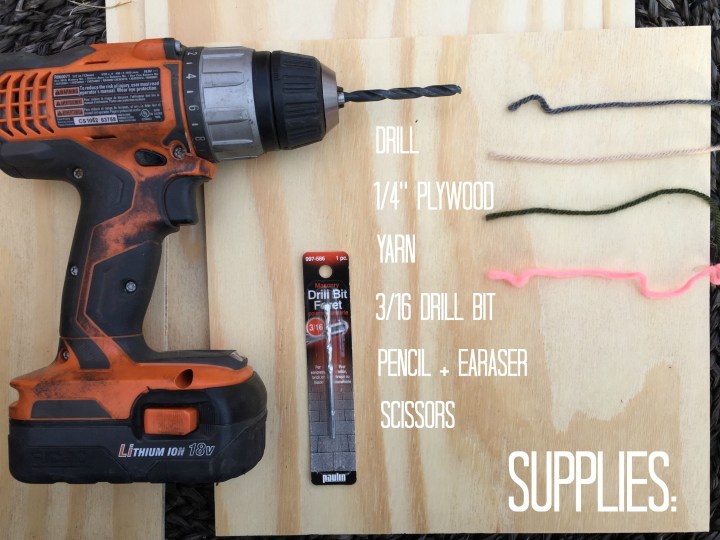
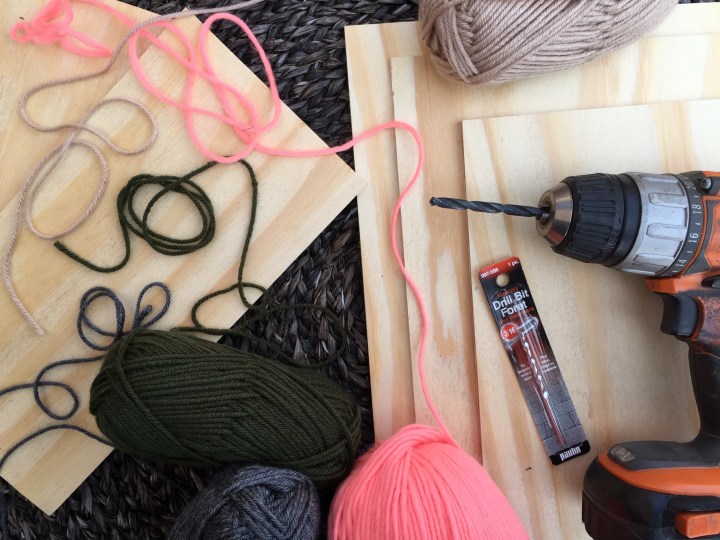
- Collect your supplies [see below]. Select a flat panel of wood. We went with a 1/4″ Fir piece from Home Depot and had them cut it into the size we wanted.
- Draw your pattern lightly with pencil onto the wood [we went with an easy cactus! However choose something with square lines, rather than rounded. All cross stitch works in a square pattern]. TIP: seriously draw it lightly! Too hard and your pencil marks won’t erase 😉

- Now it gets a little tricky! Over top of your pencil-drawn pattern, add dots where you will drill holes. Make these dots in a square pattern as shown. This is important, as with cross stitch you work in an X pattern within a square shape. We even made a small error and added an extra hole, but think it adds to the ‘character’ of it all ;). Now drill the holes.

- Erase the pencil marks as best you can. We learned the hard way and made our marks a little too hard, so not all our pattern came off! Not everything is perfect, and thus is life I suppose! haha!

- Cut a super long piece of your yarn and thread it, starting from the back up to the front, through the top hole and secure with a knot [#1]. Continue to the opposite side [#2] and follow the pattern #3, #4, #5. If this doesn’t make a ton of sense, you can easily youtube a cross stitching tutorial to get the basics down. Continue till the entire Cactus is done. OPTIONAL: Double thread it for a more pronounced pattern, as we did below.

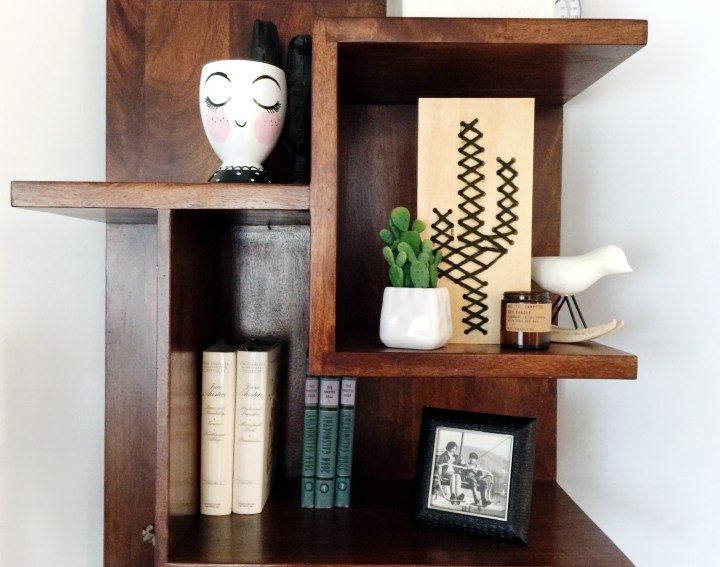

- Voila! Hang on the wall, place on a mantel, bookshelf or fireplace! Looks awesome layered with some large prints and a real cactus too!
